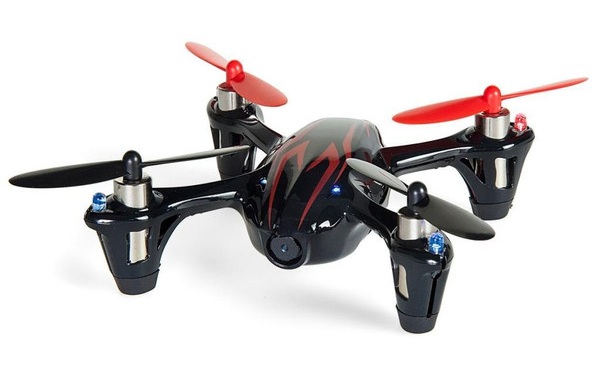
From the earliest times, humans have held a fascination with the “bird's eye” view from above. Therefore, it is not surprising that, after the invention of photography, pioneer began to turn their attention to the aerial view within a short period of time. In the past few years, the craft of aerial photography remained specialized who knew how to aggregate expensive technology. But, now, we are in a time when anybody can do it. All you need is just to have about a thousand bucks in your pocket, and you can buy a small ready-to-fly Hubsan X4 Quadcopter.
Hubsan's big breakthrough is Hubsan X4 series, launched in 2014, able to shoot professional-grade, stabilized aerial video from the top of the sky. But, the company's success is not just about one good design, but a series of savvy moves that transformed it from upstairs to unstoppable. Although, there are multifarious models are available in the market, but instead of purchasing new every time it is better to know, how to replace the old parts of your quadcopter.
Here, in this article I am going to discuss the step-by-step replacement process of your Hubsan Accessories, which will assuredly beneficial for you.
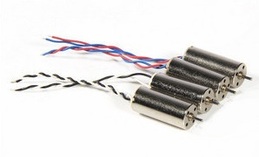
Step of Replacing the Hubsan Motor Set for X4 H107C
The Hubsan X4 is extremely fun microquadcopter, which gives you amazing flying experience. But, sometimes it may happen that your motor is stop working. This is due to certain mishappenings such as crash or burn. So, on that time replacement is required. Here are the steps, how you can replace your damage motor.
Step of Replacing the Hubsan X4 MotherBoard
The Motherboard is the most essential part of any technical device and if it gets damaged, the necessity of its repalcement is a must. Here, you can learn how to replace the Hubsan X4's mother board.
These, are the replacement process of some Hubsan Quadcopter's accessories, which will assuredly help you in future. If you want to make your flying experience astounding, it will be necessary for you to learn these steps for replacing the accessories.
Hubsan's big breakthrough is Hubsan X4 series, launched in 2014, able to shoot professional-grade, stabilized aerial video from the top of the sky. But, the company's success is not just about one good design, but a series of savvy moves that transformed it from upstairs to unstoppable. Although, there are multifarious models are available in the market, but instead of purchasing new every time it is better to know, how to replace the old parts of your quadcopter.
Here, in this article I am going to discuss the step-by-step replacement process of your Hubsan Accessories, which will assuredly beneficial for you.
Step of Replacing the Hubsan Motor Set for X4 H107C
The Hubsan X4 is extremely fun microquadcopter, which gives you amazing flying experience. But, sometimes it may happen that your motor is stop working. This is due to certain mishappenings such as crash or burn. So, on that time replacement is required. Here are the steps, how you can replace your damage motor.
- Cut the Wires of the damage motor
- Push out broken motor with the help of the screwdrivers from the Hubsan Quadcopter
- Insert new motors in the hole, but try to insert wires initially
- Join all the wires, solder them on the board, use some insulating tape to attach them correctly.
Step of Replacing the Hubsan X4 MotherBoard
The Motherboard is the most essential part of any technical device and if it gets damaged, the necessity of its repalcement is a must. Here, you can learn how to replace the Hubsan X4's mother board.
- Firstly. Disconnect the camera from the board.
- Safely remove all the wires from the mother board and push it out
- Place the new mother board by soldering all the 4 wires
- Now, attach the camera by fixing it's wires correctly; positive should be connected to other positive.
These, are the replacement process of some Hubsan Quadcopter's accessories, which will assuredly help you in future. If you want to make your flying experience astounding, it will be necessary for you to learn these steps for replacing the accessories.
 RSS Feed
